Sunday, April 16, 2017

Last Week: It's ok to fail?

It's been a great journey, and unlike many others I am very proud of what I was able to accomplish for the past 6 weeks. Chosun Saebub was a new experience for me, as I was able to have a deeper understanding of a real sword instead of sparring all the time with a bamboo sword. It was fun, helpful, worth the time practicing. It really felt like everything was going too well, and honestly I thought I would rock the Ted talk so easily......reality was like "child please"

My ted talk was awful. I was not able to present my whole script because I forgot half of my conclusion and endings, I did not even use 5 of my power point slides, and I did not check the size of the stage prior to the presentation, and I messed up big time performing Chosun Saebub.

Basically I needed enough space to take at lest 4~5 big steps for Chosun Saebub, and I did not notice that the stage was much smaller than that before my talk. So when I got up on stage trying to be all calm and chill, I saw how small the stage was, and from that moment I knew I messed up. I realized I was gonna have to shuffle my legs so awkwardly, and it really disturbed my focus. Whenever I think of shuffling I think of these two fools...
sorry

So yeah, I was very disturbed on stage. Thankfully though, I think I shuffled pretty well, even better than those two above. Unfortunately, after I finished performing my mind kind of blacked out. I completely forgot about my note cards, and I did not remember a single word from my script. Not knowing the words from my script, I could not even turn the power point slides. So basically I mumbled on with some really bad rap up and message. I feel extremely ashamed for not using the slide that had the Mr. Mcdaniel's bear stick, because I was so freaked out because of stage fright and embarrassment.
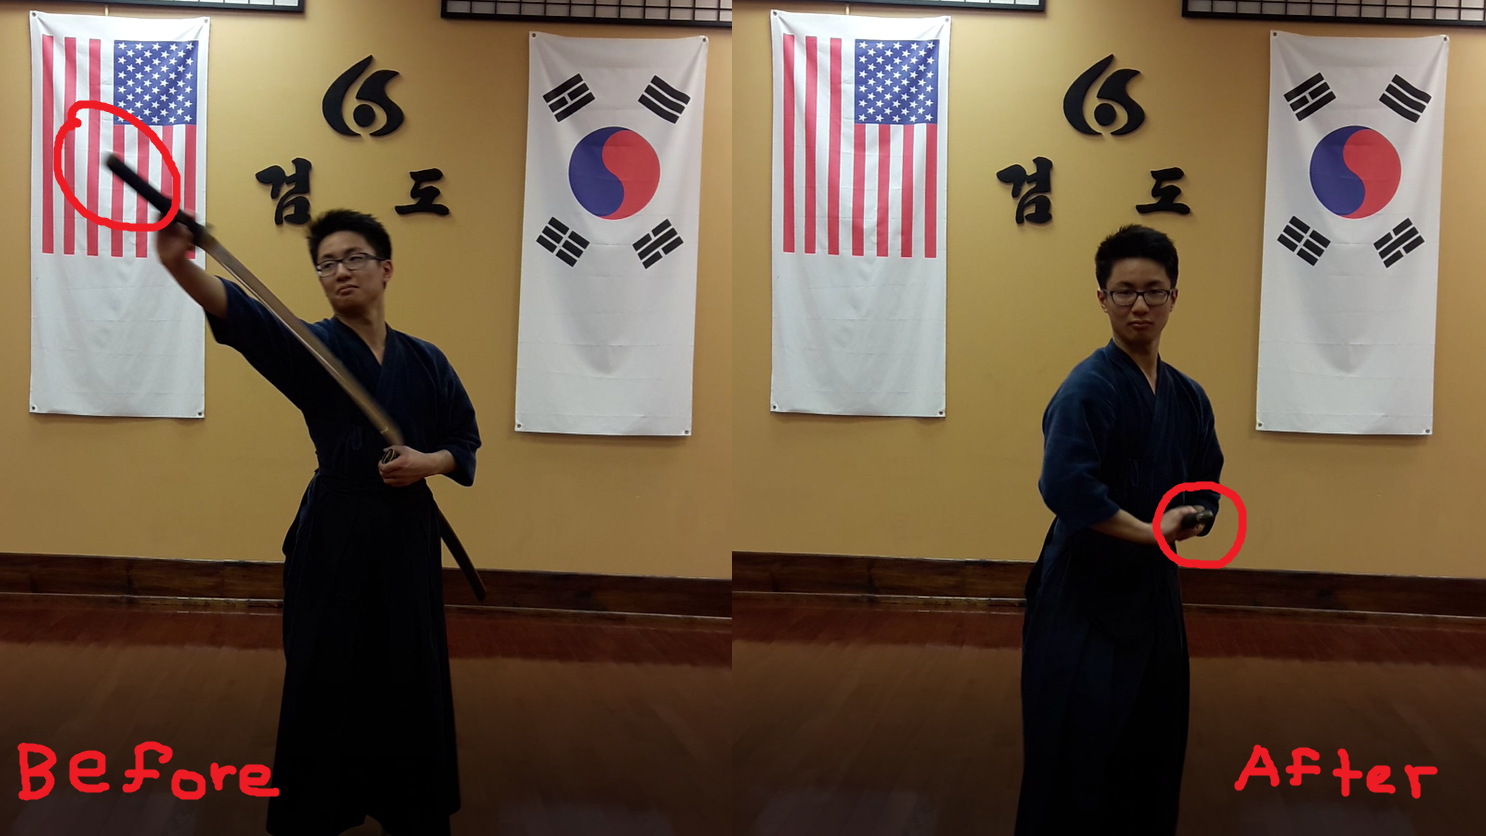
Oh by the way, I only did 4 of the 12 movements on stage, regarding the time limit I had, but here is the whole thing. 

In conclusion, my ted talk was a fail. I stuttered my whole script, I failed to engage with the audience and I did not even show what I have accomplished over the past 6 weeks. I was disappointed in my ability in public speaking, and realized how different it is to present in English in front of a stage, instead of Korean. However that is not my excuse, because it is something I must overcome with countless practice and dedication. This failure was a moment of realization how much I suck, literally, in presentations, and I MUST MUST MUST practice until I can call myself Ryan Zhao. 

Thanks for the awesome project gifted, see you later. 

P.S. I might be updating this blog later on related to my Kumdo life other than Chosun Saebub. So if you're interested, you are more than welcome to check it out! BYE 
.

Friday, March 24, 2017

Week 5:The Vlog

Today I will be posting a vlog from last Saturday! Before going into the vlog, I want to introduce what happened. 

Yong Kum Kwan has 2 Dojangs(dojo in Korean); North Wales & Elkinspark. On Satruday 3/18/17 , our traditional North Wales vs Elkinspark Kumdo battle was held in North Wales (it was kind of lit). On this day I had to fight for Elkinspark even though I am supposed to be team North Wales... but they didn't have enough people. I will also introduce how the Dojang looks like for the first time on this blog !!!

Now, let's see the vlog.

Sunday, March 19, 2017

The Interview


As you can see, this week I was able to interview my master with some questions that I had about Chosun Saebub. Master Kim is a 6 dan Kumdo master at U.S. Philadelphia Yong Kum Kwan. 

Sometimes he looks like this...


...aaaaand sometimes he looks like this
(he fixed his wall!)

Anyways, let's jump right into the interview as I ask him a few questions about Chosun Saebub.


Through this interview he clarified for me how training through Chosun Saebub is going to help me in my practice of Kumdo. I understood that even though the present might feel tedious and boring, later on it will greatly affect my forms and posture when I actually fight. Understanding the basics is the key to mastering anything. 

Once again, thank you Master Kim for the interview!

Wednesday, March 15, 2017

Week 4: 坦腹,豹頭,左夾

Welcome back! I've got some good news and bad news. The good news is that I've gotten through half of Chosun Saebub. Yay. The bad news is that I've gotten through half of Chosun Saebub. Wait, what.


The thing is that the more and more I learn, the more I'm getting confused and mixed up with different movements. For example, the 1st and 5th movements are very similar, and naturally those two are my least favorite.  Aren't you very excited.Sorry. Anyways, let's stop wasting your precious time and just jump right into the 4th, 5th, and 6th movements. 

P.S. There is always some educational value to everything, and for this project it seems like I will be learning at least 24 Chinese characters by the end of the month! (yay me) 

4.  坦腹 (Tan-bok)

 坦(Tan) means flat, and 腹(bok) is the abdomen. Combing these two characters together, the meaning is "Stabbing the opponent's abdomen at a flat level" Well, the meaning of the title of the movement is simply stabbing, but actually, after you stab your the abdomen you must slay it right after. When stabbing, the sword is slightly rotated to the left 45 degrees. Right after, raising the sword at the same angle it stabbed, you advance forward to slay the same part again. This is how it looks like. 


5. 豹頭 (Pyo-du)

豹(Pyo) means a leopard, and 頭(du) means head. Honestly, I have no clue what a leopard has to do with this movement, but that is what it means according to research. I might guess that this movement must be performed as fast(?) and fierce(?) as a leopard...? I tried. Anyways, this movement is very similar to the 1st movement, 擧鼎(Kuh-Jung), in a sense that it starts off by raising up and striking down the sword in big motion. The difference is that 豹頭 (Pyo-du) starts off with the right foot, and the sword stops at the level of the opponents knees, whereas Kuh-Jung stops at the level of the chest. After striking the sword on the opponent's head and splitting it in half (literally), you raise up the sword to your opponent's eye level, and come back to Jung-dan(holding up the sword at the level of my abdomen, and the end of the sword pointing to the opponents throat). If you did not understand many of that, it's fine. It's better to watch once than to listen a 100 times. 


6.  左夾 (Juah-hyub)

左(Juah) means left, and 夾(hyub) means to put on. Thus 左夾 (Juah-hyub) means to put the sword on the left waist. 

INTERESTING FACT:脇 is a word that means left waist...and it is read as "hyub"... hmm, I wonder what else is read as hyub? That's right, 夾(hyub) of 左夾 (Juah-hyub) sounds the same!!! Cough, tonal language, cough cough. (S/O Nina Zhang). So honestly, 左 脇 can mean the same meaning as 左夾 because both means "to put the sword on the left waist"

Alright, let's get back on track. Basically, this movement starts off by drawing the sword at putting it on the left waist, and stabbing the opponents abdomen. Then, the left foot advances N45W degrees, the sword rotating the same direction simultaneously, and slaying the opponent. Again, it's better to watch me than to listen to me. 


Final Product:  坦腹,豹頭,左夾


That was another productive week! Next week sometime I will be introducing Yong Kum Kwan, and my master! See ya.


Sunday, March 5, 2017

Week 3: 擧鼎 , 跨左, 跨右

Back again with Chongwoo's second week learning Chosun Saebub! Please be excited... or at least pretend to be
(cries)

Unless you are Nina or Jasmine (and many other Chinese(?) friends), you must be wondering what in the world you are reading in the title above. Well, they are the names of the first 3 movements of Chosun Saebub. Further explanations of the specific details for Chosun Saebub will be posted on an additional blog post, so make sure to check that out later. Anyways, this week I have managed to learn 擧鼎(Kuh-Jung), 跨左(Kwa-Juah), and 跨右(Kwa-Woo). Let's see how each of them look like.

1. 擧鼎(Kuh-Jung)


擧(Kuh) means 'to lift' and 鼎(Jung) means 'pot lid' Essentially, the basic concept of the motion of 擧鼎 is to lift up the sword and slay the opponent vertically. With the left foot advancing forward, the right hand draws the sword and lifts it up (as if lifting up the pot lid) above the head. Then, the right hand follows to grab the sword, and right foot advances forward as the sword strikes down drawing a big circular trajectory. 

2. 跨左(Kwa-Juah)


跨(Kwa) means 'to go over' and 左(Juah) means 'left' This movement avoids the strike of an opponent from the left and slays his body, and turns back forward and slays in diagonal motion two times. In the beginning, the left foot turns slightly to the left as the sword is drawn, and as that happens the strike from the left is blocked. Immediately after the opponent's sword slides off mine, I twist the sword and slay the opponent from right to left in 45 degrees. Then, the body turns forward to slay the opponent two times 45 degrees. As the movement is finished, the right hand switches its position on the handle to hold it from the above, and performs a reverse withdrawal. 

3.  跨右(Kwa-Woo)


跨(Kwa) means 'to go over' and 右(woo) means 'right' As an opponent is attempting to strike from the right, I cut his wrist and slay his body, and turn back forward to slay the opponents body horizontally. opposite from 跨左, the right foot turns right as the sword is drawn to immediately cut the opponent's wrist from left to right. Then the tip of the sword turns as the right hand finds the sword, and cuts the body of the opponent 45 degrees from left to right. Finally, the sword flips over and the left foot turns forward, to cut the opponent's body horizontally. Again, a reverse withdrawal is performed. 

Final

There are so many errors I must fix for not only during the genius project but also for a long time after. I learned that it will take countless repetition/practice in order for myself to naturally perform these movements. Also, I cannot use a real sword to practice due to my inexperience and for safety. Getting used to using a real sword will also be a huge challenge. 

Next week I'll be back with an interview with my master, a more detailed description of the whole story about Chosun Saebub, and of course, the 4th 5th and 6th movements. That's it for today, but don't be too depressed, I'll come back next week! 


Sunday, February 26, 2017

Week 2: Drawing and Withdrawing the Sword

The first time my master told me that drawing and withdrawing the sword will take more than a week to master, I did not believe him. I mean, how hard could it be? You simply pull the sword out, and pull it back in? However, the first time I held a real sword and tried to pull it out, I realized I look really dumb. Here's an embarrassing video of myself trying to pull out and put in a sword.  


So you get the point, it's actually not that easy of a task. There are specific steps and details that must be followed, in order for yourself to not look as dumb as I did in the video. Here are the steps I have learned.

1. The Angle 

     Before drawing the sword, the left hand must rotate the sword 90 degrees to the left. This will face the sides of the sword parallel to the ground. If the sword is not rotated, I would have to awkwardly twist my wrist to grab the handle of the sword.
   
2. Tip of the Handle 

     The tip of the handle of the sword must face FORWARD when drawing and withdrawing the sword. As you could see in the video above, I did not know that correctly. In order to do this, the right shoulder and leg must come forward. This lets the handle of the sword, which was currently facing right, turn to the front.  

3. Pull out completely 

     Because the sword is longer than my arm, I had a hard time completely pulling the sword out of the case before I turn the sword to its original angle. As a result, the sword scrapes the inner part of the case as it comes twisting out. This became worse as I stiffened my body and only used my arm to pull out the sword. Watching this, my master told me to relax and use the turning of my entire body to add an extra length to pull out the sword. 

4. Blood on the sword

     Not that I will ever actually cut someone with a sword, let's just say I did for the sake of the martial art. The sword would be covered with blood and probably some disgusting flesh, and it would be nasty if all that blood went inside the case with the sword. Thus, before withdrawing the sword back in, we let the blood drip off by doing this,

5. Create a tighter hole as thin as the sword. 

     Which hole would be harder to put the sword in? A big hole or small hole? You probably thought it would be the big hole (or at least I did), but it is actually the opposite. The bigger the hole and empty, the more the sword will move around while searching for the entrance to the case. In order to prevent this, I had to create a tighter hole with my fingers that covers up the hole of the case. 

6. Slide the back of the sword on the hand.

     Putting the sword back into its case is essentially the same concept. The case of the sword should be rotated left 90 degrees, and the tip of the handle must face forward.  However, there is one additional step. In order to find the hole created with the fingers, the sword must trace its path to the hole. This is done by sliding the back of the sword on your hand until the tip of the sword reaches the hole. 

7. Back to the original angle

     As soon as the tip of the sword reaches the hole, the sword should rotate back to its original angle(the sides of the sword being perpendicular to the ground) Finally, the sword should slide back into its case, smoothly and lightly pushing down the non-sharp side of the sword. 

Product of Week 1


As my master has already said, I must put in more time to put all these steps into one smooth movement. My back should stay straight at all times, and my elbow should unfold completely when pulling out and putting in the sword. My master told me that I have improved a lot, but he wants me to keep practicing as I move on to the movements of Chosun Saebub. 

That's it for this week. Come back next week to see the first 3 movements of Chosun Saebub, Bye!

Timeline

Week 1: Drawing and Withdrawing Sword

Week 2: Learn the 1st(擧鼎), 2nd(跨左), and 3rd(跨右) movement of Chosun Saebub.

Week 3: Learn the 4th(坦腹), 5th(豹頭), and 6th(左夾) movement of Chosun Saebub.

Week 4: Learn the 7th(右夾), 8th(御車), and 9th(御車) movement of Chosun Saebub.

Week 5: Learn the 10th(展翅), 11th(腰擊), and 12th(鳳頭) movement of Chosun Saebub.

Week 6. Practice all 12 movements of Chosun Saebub.

Tuesday, February 14, 2017

Week 1: My Passion

The Genius project asked me about my passion. It was one of the easier questions for me (which is rare) because there is only one time my lazy body works harder than ever: when I'm practicing Kumdo. Before I get in any deeper into this topic, I bet half of you are wondering how to pronounce that word, so I will make it clear that it is pronounced as "come-doe"
Kendo is a Japanese martial art of swordsmanship, and Kumdo is the same thing except Korean. If one has not been properly trained on how to fight with swords, it is hard for them to realize how difficult the sport might be. A friend of mine asked me "Why can't you just swing the sword like a baseball bat and hit the other guy?"


There is a clear difference between being a thug, and a swordsman in Kumdo. Precise control of the sword, efficient and quick footwork, mentality, and concise trajectory of the sword is what differentiates thugs fighting with sticks and a swordsman fighting with a sword. 

I have planned to polish the quality of my Kumdo skills by practicing the Chosunsaebub, the traditional Korean swordsmanship. This will help my ability to effectively control the space between myself and my opponent, have a more proper form for my strikes, and get better control of my sword. My master at Yong Kum Kwan (the place I train) will train and assess me through the process, helping me measure my progress throughout the project. By the end, I will be able to perform the Chosunsaebub on my own in a smooth and accurate fashion.